Category Archives: American

A midsummer night's bbq tempeh sandwich
When I say “temp,” you say “eh!”
“Temp” (“Eh!”)
“Temp” (“Eh!”)
I’ve got a confession to make. I made these sandwiches a while ago, took my pictures and have since forgotten exactly what I put in them.
It was a last-minute meal but one that was surprisingly delicious and very filling. The end result is something resembling a sloppy Joe in texture, but with a little more crunch and a lot more bbq.
The most vivid memory I have of making these was that I thought I had way more bbq sauce than I actually had. So, my “sauce” was half bbq and half ketchup/honey/red wine vinegar/salt/pepper/etc.
And as far as the tempeh goes, I like the three-grain. It’s got the best texture, and it doesn’t have that bitter taste that some tempeh has. And you can buy it in most grocery stores (well, at least Publix).

I know, it doesn't look appetizing yet... keep scrolling.
I know, for a fact (because it’s in my pictures), that I made some roasted asparagus as a side dish. Tossed them in a little olive oil and sprinkled with salt and placed in the oven until they were soft but not mushy.
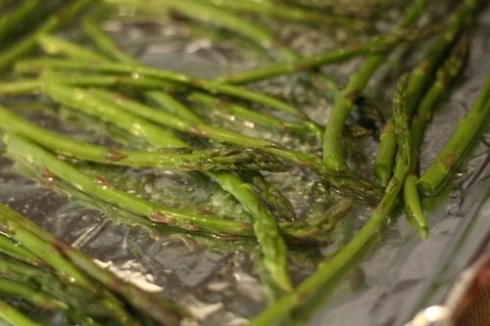
Roast 'em.
So here’s what I remember from this meal:
Here’s what you need:
- 1 package of three-grain tempeh (you can make your own, but it’s complicated, and this ain’t the blog for that)
- 1 red bell pepper
- 1/2 medium onion
- 1 cup or so of your favorite bbq sauce (check before you start cooking)
- 4 buns
- vegetable broth (optional)
Here’s what to do:
Step 1) Slice the tempeh into relatively thin slices and boil in vegetable broth for ten minutes or so. This helps prevent the tempeh from getting too rubbery and gets rid of any bitterness that may develop after cooking (this step may be entirely unnecessary, but I’ve never not done it, so I wouldn’t know).
Step 2) Use tongs to remove the tempeh and lay it out on paper towels to drain off excess moisture.
Step 3) Cut the tempeh into small cubes and sautee with just the slightest bit of olive oil. The goal is to get them golden brown on all sides but first…
Step 4) After the tempeh has been cooking for a few minutes, add to the pan (or start in another pan, as I did) some diced onions and bell pepper. I didn’t want them fully carmelized, just a little softer than raw.

Stir it up, stir it up good, uh!
Step 5) When the tempeh is sufficiently golden (maybe 7-10 minutes on medium heat), add in the onions and peppers and a small bucket (okay, a cup) of bbq sauce. Keep adding sauce until you get a sloppy-Joe-ish texture and everything is hot.
Step 6) Add to a toasted bun, and grab some napkins.

I paid extra for that sesame seed bun, just for this picture.
2 Comments | tags: asparagus, barbeque, bbq, do i need to boil tempeh, how to cook asparagus, how to cook tempeh, i hate tofu, is tempeh good, onion, sandwich, sloppy joe, tempeh, vegan, vegan recipe, vegetarian, vegetarian bbq, vegetarian recipe, vegetarian sloppy joe, what is tempeh | posted in American, Recipes

Perfect football game food
I really like Chipotle (the restaurant). I know, I know, the burritos ain’t good for ya. Over 1,000 calories, lots of sodium, fat and cholesterol, and I never feel good after eating a whole one. But I feel great while I’m eating it. Delicious.
As a restaurant chain, they also get brownie points for being conscious of dietary restrictions. Everything but the meat and pinto beans are vegetarian (no rennet used in the cheese), everything but the taco shells are gluten free and they do a good job of buying local and from sustainable farmers. They claim to buy a larger percentage of naturally raised meat than any other restaurant chain in the county, and I don’t doubt that.
Don’t listen to those who say it’s far worse than a Big Mac. As they say, haters gonna hate.
But until a few weeks ago, I never really thought about what an actual chipotle chile is. Turns out, it’s a jalapeno.
Apparently (and this is from Wikipedia, so if I’m wrong, it’s not my fault), jalapeno farmers pick and sell unripe green peppers early in the season and we buy those at grocery stores and produce stands and pickled in jars. Then, later in the season, the peppers turn bright red and are picked and sold as fresh peppers in the US and Mexico. At the end of the season, the peppers that are left usually begin to turn brown and shrivel.
Those are the chipotle peppers. They are picked and then smoked, and you can buy them dry or canned.

Dried and smoked chipotle pepper | Photo from Wikipedia
I’ve cooked with ’em twice. Once for this recipe and another time, where I famously (to my wife, at least) misread “add one canned chipotle pepper” for “add one can chipotle peppers.” I added the whole can to a soup. The whole can. Tasted like lava.
But it’s an easy mistake to make. It was a can of chipotle peppers in adobo sauce, which smells sort of barbeque-y, not spicy. So keep that in mind if you try out this recipe. You need one PEPPER, not one CAN.
Here’s what you need:
- Tortilla chips
- 1 cup shredded cheese (your call on the type)
- 1 can of pinto beans, drained and rinsed
- 1 red bell pepper
- 1 small onion
- 1 chipotle pepper in adobo sauce
- 7 oz (or half a 14 oz can) diced tomatoes with basil and garlic
- 1 tomato (diced)
- Shredded lettuce (optional)
- Sour cream (optional)
- Guacamole (bought or homemade)
Here’s what to do:
Step 1) Add diced onion and red peppers to a pan with a little olive oil. Simmer until the onions become translucent (about 5 minutes).

Preppin' the onions
Step 2) Add in one finely diced chipotle pepper in adobo sauce, plus another spoonful or two of the adobo sauce. Add in the drained/rinsed pinto beans. Add in the diced tomatoes. Let it mingle for a few minutes, until everything is blended and hot and the mixture has reduced.
Step 3) Preheat oven to 350 degrees.
Step 4) Spread chips on a cookie sheet and top first with cheese and then with the onion/pepper/bean/chipotle mixture.
Step 5) Bake for 5-10 minutes, or until cheese is melted.
Step 6) Remove and top with diced tomato and lettuce, sour cream and guacamole.

2 Comments | tags: bell pepper, chipotle, chipotle nutrition, chipotle pepper in adobo sauce, chipotle peppers, chipotle recipes, chipotle vs big mac, chipotle worse than mcdonalds, easy, guacamole, hot, is chipotle good for you, is chipotle healthy, Mexican recipe, nacho cheese, nachos, pinto beans, quick, spicy, tomato, tortilla chip recipe, vegetarian, vegetarian recipe, what is a chipotle, what to make for a party | posted in American, Mexican, Recipes

Perfect for weekday lunches
I did it, y’all. The research paper is done, the presentations are done, the reviews are done. And now I have from now until August to work, read, write, blog and enjoy the pleasant Florida summer.
You’ll have to excuse my lack of posts over the last week. It was a rough one.
But I’ll try to make up by posting some of the things we’ve been eating.
One of our favorite weekday lunch ideas is pasta salad, which we make in varying forms about every other week. It’s great because we can make it on a Sunday afternoon and it’s good for several days of lunches – which means having less to do in the mornings which in turn means more time to sleep.
The recipe that follows was the mix that we happened to put together last week, but I encourage you to add in whatever you can find around. Cool, crisp summery veggies seem to be the best compliment to the pasta, I think. We like ours heavy on the veggies, so reduce those numbers if you like it more pasta-y.
Oh, and we added in a can of garbanzo beans, which don’t have a ton of flavor by themselves but add some good protein to the lunch.
What you need:
- 1 cup diced carrots
- 1 cup diced celery
- 1 diced cucumber
- 1 can chickpeas (drained and rinsed)
- 1 cup of mozzarella cheese
- 2 medium tomatoes, diced
- 1 green bell pepper, diced
- 1 box multi-colored rotini pasta
- 1 cup Italian dressing (store bought or make yo’ own)
Here’s what to do:
Step 1) Cook the pasta according to package directions.
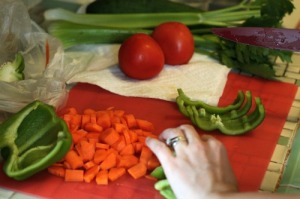
Prepping the pasta salad veggies
Step 2) Dice the carrots, celery, bell pepper and tomatoes. Drain and rinse a can of chickpeas.
Step 3) When the pasta is cooled, place in a large serving bowl and add in the diced veggies and cheese. Pour in the Italian dressing and stir to coat.
Baddabing, baddaboom. Lunch for a few days.
1 Comment | tags: bbq side dishes, Beans, carrots, celery, cold, cookout food, easy, easy lunch ideas, garbanzo beans, italian dressing, lunch, pasta, pasta for lunch, pasta salad, salad vegetarian, simple, vegetarian recipes, what to have for lunch | posted in American, Recipes, Salads, Sides
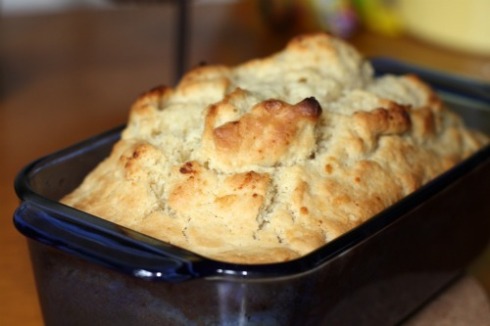
Easy, butter beer bread - so, so good.
Yeah, I hadn’t heard of it either.
But if someone says you can put beer in bread, or beans in brownies, I can resist trying it out.
So this one is exactly like what it sounds – it’s regular bread, except it has beer in it. You leave out the yeast, and the yeast in the beer does the trick. The resulting bread was extremely good. And way easier than I expected.
The recipe I used made from a bread that had a slightly buttery, crunchy crust and a dense, moist bread. It’s not the kind of bread you’d make PB&J on, but it’s perfect as a side to an otherwise light meal. OR, as we did, just make it in the middle of a lazy afternoon and eat half the loaf while you watch a movie.
As far as the beer goes, I have no idea. I’ve made this once, with Miller Light (because the other beers we had around have citrus flavors, and I wasn’t sure how that would taste), and it was delicious. I’ve heard/read that Guinness makes a good bread as well.
Oh, and you can make it vegan by subbing vegan margarine (like Earth Balance) for the butter.
(Recipe adapted from food.com)
Here’s what you need:
- 3 cups flour (sifted – or at least spooned into the mixing cup – do not pack!)
- 3 teaspoons baking powder (omit if using Self-Rising Flour)
- 1 teaspoon salt (omit if using Self-Rising Flour)
- 1/4 cup sugar
- 1 (12 ounce) can beer
- 1/2 cup melted butter (1/4 cup will do just fine)
Here’s what to do:
Step 1) Preheat oven to 375 degrees.
Step 2) Mix the dry ingredients and the beer in a large mixing bowl, making sure to get rid of all clumps. Add half of the melted butter to the mixture.
Step 3) Pour mixture into prepared loaf pan, and then pour the remaining butter on top (you could leave this out if you want, but I liked the buttery crust)
Step 4) Bake for 1 hour, uncovered. Then remove and let cool for 15 minutes (or don’t, but it’s going to be hot – fair warning).

5 seconds after I burnt my hand trying to cut the bread right out of the oven
But, if you’re in the mood for a different flavor, my good friend and fellow blogger BNF coincidentally whipped up
her own batch of unconventional bread recently – I’ll guarantee you it’s good.
19 Comments | tags: 6 ingredient bread, beer, beer bread, bread, bread for lazy people, easiest bread recipe, easy, easy beer bread recipe, guiness beer bread, guinness beer bread, how to sift flour, is beer bread healthy, is bread healthy, moist beer bread, quick bread recipe, should i eat bread, side dishes with bread, simple beer bread recipe, vegan, vegan recipe, vegetarian, vegetarian bread recipe, vegetarian recipe | posted in American, Recipes, Sides

Spicy sausage balls | Photo by HFLP
Oh, the venerable sausage ball. The friendliest finger food I’ve ever known.
These little guys are simple, and if I do say so myself, delicious. I could have come up with a more elegant name for them, but it wouldn’t be true to the nature of the food.
A little bit of sausage, a little cheese, a little spice in a small, warm ball of dough – really, what could be better?
They are perfect for pot lucks, parties and hanging-out-watching-the-game…
These have been made for years with regular sausage, but they adapt well to vegetarian sausage. For the latest batch, we added some dice jalapenos, and it added the perfect zip to complement the sausage (and vegetarian sausage isn’t real spicy, so it’s a good addition).
They are incredibly easy to make, the only un-fun part (and it’s really the only part) is mixing all the ingredients, which I usually convince someone else to do for me. You can only do it by hand and there’s something unagreeable about sausage squishing through my fingers, vegetarian or otherwise.
Here’s what you need:
- 1 lb vegetarian sausage (use the ground Gimme Lean brand, trust me)
- 3 cups Bisquick
- 2 cups of your favorite shredded cheese (I usually go cheddar, but other kinds work well)
- 1/4 cup finely diced jalapenos (optional, but recommended)
- Less than 1/8 cup milk (really just a literal “splash”)
Here’s what to do:
Step 1) Mix the ingredients, by hand, in a large mixing bowl. When you can’t seem to get all the Bisquick absorbed, just keep going. If you still can’t, add another splash of milk (a little goes a long way).

Ali mixing for me | Photo by HFLP
Step 2) Form into mounds roughly the size of ping pong balls on a lightly greased cookie sheet.

Cram 'em on the cookie sheet | Photo by HFLP
Step 3) Bake at 350 degrees for about 10-12 minutes

Fresh from the oven | Photo by HFLP
Enjoy ’em. Thanks for reading!
Leave a comment | tags: bisquick, bisquick and sausage, cheese, easy, food to eat during sports, football food, meat substitute, quick side dish for a party, quick snack for a party, sausage, side dish, snacks, things to do with bisquick, vegetarian, vegetarian recipe | posted in American, Appetizers, Recipes, Sides
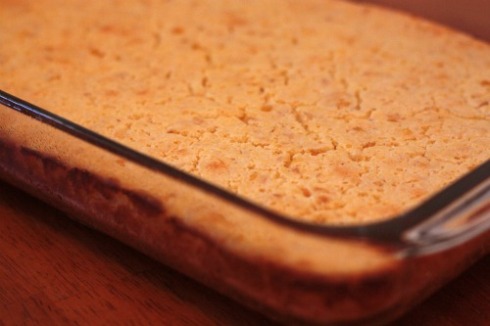
Creamy Corn Souffle | Photo by HFLP
If I had another, more sinister blog called “Unhealthy Food Lazy People,” I’d probably put this recipe there, instead of here.
But, it’s not meant to be eaten as anything other than a side dish, and for that, it’s a great recipe. It’s a Paula Deen-ish kind of thing.
I made it last week for a Kentucky Derby party hosted by our good friends and the world’s greatest neighbors (no joke). It was a smashing success, as it usually is. (One of these years, the horse I bet on will net me the big prize, but that year wasn’t this year, or any of the last 10)
I call it a souffle because, frankly, that’s what it is. But also, making things sound french is a good way to make them more impressive. I mean, would you rather have a beignet or a big donut hole? A cafe au lait or coffee with milk? A pizza or une pizza?
It’s incredibly easy to make, just make sure to take it out of the oven at the right time. It’s not cornbread, despite how it looks in the dish. The top isn’t supposed to brown uniformly, just a little around the edges, if at all. A toothpick test in the middle usually lets me know.
EDIT: And I just want to point out quickly, Jiffy brand corn muffin mix is not vegetarian. I know the Martha White brand is, and they carry that everywhere right next to Jiffy, so go with that one. Thanks, peppertree.
Here’s what you need:
- 8oz of sour cream
- Stick of butter, melted
- 1 1/2 cup of Martha White corn bread mix
- 2 eggs
- 1 can of corn
- 1 can of cream corn
- 9 x 13 dish, or something similar
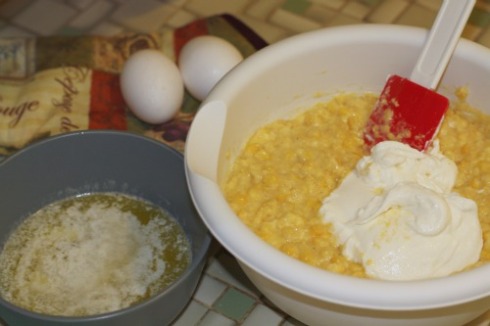
Stir it up, stir it up good, ugh! | Photo by HFLP
Here’s what do do:
Step 1) Mix all of the ingredients in a large mixing bowl.
Step 2) Pour into a 9 x 13 baking dish.
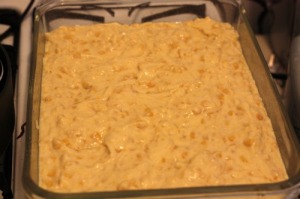
Waiting for it's turn in the oven | Photo by HFLP
Step 3) Bake, uncovered, for 35-40 minutes at 350 degrees.
Step 4) When the edges begin to brown, remove from oven and serve warm.
Now, just don’t sit and eat it all by yourself.
As always, thanks for taking the time out of your busy day to read my little blog.
4 Comments | tags: animal fat in jiffy corn bread mix, appetizer, corn, corn souffle, corn soufflet, creamy corn bread, easy side dish, is jiffy corn bread mix vegetarian, Kentucky Derby food, martha white corn bread mix, moist corn bread, palla deen, paula dean, paula deen, quick dish to bring to parties, side dish for cookout, side dishes, vegetarian, vegetarian recipe | posted in American, Appetizers, Recipes, Sides

WATER!!! | Photo by HFLP
I’m still relatively new to Gainesville, and I’ve got mixed feelings on the place. On the one hand, I can walk to school, work, about 30 restaurants and pubs and a park. Granted, I have to make it through a variety of colorful characters to get to any of those places – affable dumpster-diving can collectors, herds of marauding feral cats and the ever-present tribes of exactly the same similarly-dressed sorority sisters (I’ve ranked them in order of most to least enjoyable).
And the heat is getting rather stifling.
I grew up by the water in a charming little town called St. Petersburg (not really little, or a town). It’s surrounded on three sides by water and, while it gets hot, it never approaches the depressing oppression of the Gainesville summer. And when it does get hot in St. Pete, you go to the beach or the pool and relax.
Gainesville is surrounded on all sides by nothing, which is a new sensation for me. I can drive an hour to the Florida’s west coast and visit Cedar Key (as I will on Friday) or an hour and a half to St. Augustine on the East Coast. For someone who’s spent all of their life within 5 minutes of a beach/boat launch/kayaking bayou, that’s a tough reality to face.

Kayaking through Weedon Island in St. Pete | Photo by HFLP
In Journalism school, these first few paragraphs would be known as a “false lead.” This post is really about a pastry, but I couldn’t help spilling my guts on the hometown blues that had been getting me down.
So, with a week off in between Fall and Summer semesters (thanks, grad school), we decided to head home and spend some time with family, which ended up being a nice respite from all the joys of school and dry land.
And (here comes the big transition), while we were in town, we tried out this recipe for Asparagus and Parmesan Cream Pastries.
They were great, although, if you follow the instructions, they make for a somewhat strangely portioned appetizer, in my opinion. Each piece, it seemed, was larger than what I expected (more than one person could eat as an app or side dish, provided that one person wasn’t me). So, I’ll recommend cutting them into smaller chunks if you’re having multiple people over to eat.

Asparagus and Parmesan Cream Pastry | Photo by HFLP
Here’s what you need:
- 8 ounce(s) of Philadelphia Cream Cheese
- 1 sheet frozen puff pastry dough
- 1/2 cup(s) of grated parmesan cheese
- 3 tbsp. of fresh lemon juice
- 5 basil leaves, chopped
- 1 pound(s) of fresh asparagus (16 spears)
- 1 pinch of sea salt
- 2 tbsp. of olive oil
- 2 tbsp. of shaved parmesan cheese
- 1 nonstick cooking spray
Here’s what to do (directly from the source):
Step 1) Preheat oven to 400 degrees F.
Step 2) Remove pastry dough from freezer and let thaw for 10 minutes.

Any last words, Asparagus? | Photo by HFLP
Step 3) While dough is thawing, wash and trim asparagus so it is 1 in. shorter than the pastries.
Step 4) In a medium bowl, combine cream cheese, grated parmesan, chopped basil leaves, and lemon juice. Set aside.
Step 5) Spread dough onto a baking sheet sprayed with nonstick cooking spray. Cut into four equal rectangles and spread apart slightly on sheet.
Step 6) Spread cream cheese mixture onto each of the pastry rectangles, not quite to each edge. Press four asparagus spears onto each rectangle, alternating direction. Sprinkle pastries with a pinch of sea salt and drizzle with olive oil.

Ready to go into the oven | Photo by HFLP
Step 7) Bake at 400 degrees for 18-22 minutes until pastries are golden brown.
Step 8) Remove from oven, slice each pastry in half (and then half again) and transfer to serving platter. Garnish with a sprinkle of shaved parmesan cheese and serve (I skipped this step, for lack of shaveable parmesan)
And I’d like to also note that I didn’t have a proper camera with me, so these pictures are all oil-on-canvas. Kidding, from my iPhone.
One final thought – best of luck and best wishes to my buddy Grant, who set out this past week to thru-hike the Appalachian Trail, from Springer Mountain, GA all the way to Maine. That’s a really, really long walk.
Leave a comment | tags: appetizer, asparagus, complaints about gainesville, easy, gainesville, heat, parmesan, pastry, quick side dish for a party, racheal ray, rachel ray, saint pete, side dish, st petersburg florida, vegetarian, vegetarian recipe, what to make for pot luck | posted in American, Appetizers, Recipes, Sides

Plantain and pickle sandwich | Photo by HealthyandLazy
The semester is over! Root beer floats for everyone!
The last week has been a rather dull one, food-wise. Clawing my way through the last week of my first year of grad school, my quest to cook new foods was pushed to the back burner. But I’m back, whew.
Anyways, a few weeks ago, a friend recommended a little hole-in-the-wall restaurant in Gainesville, called Flaco’s. I know they are regionally-famous for their Cubans (sandwiches), but as usual, I got the veggie option. Luckily, they make a mean veggie sandwich – I got one stuffed with plantains, pickles and cream cheese.
It’s a weird combo, I know, but it works. If you love sweet plantains (and who doesn’t?), it’s a great weekend lunch and easy to make at home.
I’ll admit, I cheated a little – I used frozen sweet plantains from Publix, but if you want to make them from scratch, check out this recipe. Making sweet plantains is easy, but you have to let the plantains turn black before starting and that poses two problems for me: I’d have to wait several days to eat this, and black vegetables make me cringe.
Go for it.
Here’s what you need:
- Cuban bread (it’s your call on the amount. I used about a half of a long loaf, because it needed to be used up, and then I ate so much I was full for a day and a half)
- Frozen sweet plantains (about a cup’s worth)
- Pickles
- Cream cheese

Load it up! | Photo by Healthyandlazy
- A little bit of butter for your pan
Here’s what to do:
Step 1) Slice your bread in half, and generously top with cream cheese, pickles and cooked, sweet plantains (they should already be hot)
Step 2) Drop a blob of butter in your pan and swirl it around. Place the sandwich in the pan and press with hands/spatula/brick covered in foil until it begins to flatten out. When it starts getting a little brown on the bottom, flip and repeat. Don’t burn yourself.

Thanks Flaco's, good idea. | Photo by Healthyandlazy
Of course, if you happen to have some sort of panini press or George Foreman grill, that would do the trick. My tiny kitchen only has room for me and one pan, though.
5 Comments | tags: cuban sandwich, easy lunch, Flaco's cuban sandwich, Flaco's Gainesville, lunch, pickle, plantain, sandwich, vegetarian Cuban sandwich, vegetarian recipe | posted in American, Recipes

One egg is an oeuf | Photo by HealthyandLazy
My wife and I spent this Christmas in Paris, visiting museums and playing in the snow. And while the art and architecture and atmosphere are great, what really sets Paris apart is the food. Traveling on a budget, we frequented the sidewalk vendors and whole-in-the-wall sandwich shops way more than the fancy Parisian restaurants.
We were lucky to have a great little Panini/Crepe stand right by our hotel in the Latin Quarter. It was probably 4 ft by 4 ft and was painted bright yellow, with a large sign reading “Open 24 hrs a day.” In typical French fashion, it was closed a lot. BUT, when it was open, I was drawn to it like Barry Bonds to steroids.
I’ve been going into crepe withdrawals the last few months…
Ever since I saw the crepes that Liz at Veg made, I’ve been itchin’ to try them for myself. Sunday afternoon seemed as good a time as any.
I used the same recipe she did, which was borrowed from Stolen Moments.
It’s a simple recipe (you probably already have the stuff lying around), and they are surprisingly easy to make. I always thought you had to have one of those big flat things that I saw guys in France using. Not true.
I used a small 9″ pan, poured the batter and swirled it around until it covered the flat of the pan. A fork flips them nicely and once you get into a rhythm, you can crank ’em out pretty fast.
There are plenty of ways to stuff them after their cooked – we made some with nutella, some with strawberry preserves, some with mozzarella cheese and a few lightly sprinkled with sugar. They were all great.
I also halved the recipe from stolen moments, and it still made a ton of crepes (probably 10 or so) – more than a snack for us, so we slipped one to our lazy pooch, Oliver.

Crepes stuffed with Nutella | Photo by HealthyandLazy
Here’s what you need (for the half recipe):
- 3 eggs
- 3/4 cup flour
- 3/4 cup milk
- 1/8 cup sugar
- 2 tablespoons melted butter
- 1/8 tsp of salt (2 or 3 shakes)
- 1 tsp of vanilla extract
- toppings (Nutella!!)
Here’s what to do:
Step 1) Mix all of the ingredients in a blender, or with a whisk, but make sure to get all the flour lumps out.
Step 2) Melt a small amount of butter in your pan before the first crepe, and then pour in about 1/4 cup of batter, swirling the pan so that the batter covers the entire flat part of the pan.
Step 3) It’s time to flip when the outsides of the crepe looks dry but the inside is still wet. This usually takes about 1-2 minutes.
Step 4) Flip and cook the other side for another 1-2 minutes.
Step 5) Remove from pan and add your favorite topping. Repeat (but don’t add butter each time, once is enough).

Ready to flip | Photo by HealthyandLazy

Ding ding done! | Photo by HealthyandLazy
I loved these crepes. They’re an anytime food – add tomatoes and mozzarella in the morning and you’ve got yourself a breakfast crepe. Add some lemon juice and sugar and you’ve got yourself an afternoon crepe. Nutella makes an awesome dessert crepe.
And best of all, they are Oliver approved… and he’s a picky eater.

Skeptical Oliver | Photo by HealthyandLazy
20 Comments | tags: breakfast, crepes, easy, egg, french, nutella, side dish, vegetarian recipe | posted in American, Desserts, Recipes, Sides

Spaghetti with Crazy Sauce | Photo by HealthyandLazy
I’ve been inspired lately by the great pasta posts over at Brave New Food.
My wife spotted an interesting recipe in a Rachel Ray magazine and we thought we’d give it a try. It’s got a funny little sauce, with garbanzo beans and jalapenos and curry powder, but at the end of the day it still fills you up like a plate of spaghetti should.
The beans replace the protein you would normally get from the meatballs, the curry powder gives it some great flavor and the jalapeno adds just the right amount of spice.
Top the pasta with goat cheese to add some creaminess and you’ve got yourself a good meal.
It was the perfect pick-me-up for what has been, so far, a rather bleak start to the baseball season by my hometown Tampa Bay Rays. C’mon fellas.
Also, I’ve been trying to think of a slick way to get a picture of my dog into the blog, and so far, nothing has come to me – so I’m just going to kick off this recipe with his beautiful mug.

Gimme my Dinna | Photo by HealthyandLazy
And now, on to the good stuff:
(again, recipe courtesy from the Rachel Ray Magazine May 2011 Issue)
Here’s what you need:
- 1 lb whole wheat spaghetti
- 1 onion, finely chopped
- 1 fresh chile pepper, seeded and chopped (I used a jalapeno)
- 4 cloves garlic, finely chopped

Sauce Ingredients | Photo by HealthyandLazy
- 2 tbsp mild curry powder
- 1/2 cup vegetable stock
- 1 can chickpeas, drained
- 1 can (28 oz) crushed tomatoes
- salt
- olive oil
- goat cheese for sprinkling
- parsley for garnish
Here’s what to do:
Step 1) Cook the pasta according to the directions on the package.
Step 2) Meanwhile, in a big saucepan, begin cooking the diced onion,

Simmerin� Sauce | Photo by HealtyandLazy
garlic and chile pepper in a few splashes of olive oil. After 2-3 minutes, add in curry powder and a dash of salt. Let it sit for another minute or two, and then add in the veggie stock, tomatoes and chickpeas.
Step 3) Let it sit for 15-20 minutes until the liquid steams off a little, stirring occasionally.
Step 4) Add the sauce to the cooked pasta and toss.
Step 5) Top with goat cheese and parsley and eat it up.
I’d also like to announce, unrelated to this pasta, a new addition to my family – a new baby nephew, RJ.

Poker Face | Photo by HealthyandLazy
2 Comments | tags: Beans, curry, italian recipe, Jalapeno, pasta, rachael ray, rachel ray, spaghetti, vegetarian, vegetarian recipe | posted in American, Italian, Recipes


